

NGL, we strangely derive satisfaction watching Cleanser 1’s pink gel texture transform into a luxuriously rich dense foam.

The bouncy lather feels so comforting when massaged on the skin, making the cleansing process really therapeutic.

The rich foam is crucial for trapping and removing dirt and impurities on our skin for a thorough cleanse.
With its unique gel-to-foam texture, new users may need some time or a little help at the start to perfect the foaming process.
How to foam Cleanser 1: 6 do’s and don’ts
Below are a few tips and tricks on how to foam Cleanser 1 that’ll make sure you turn that pink gel into a rich foam every time! #AchievementUnlocked
Do’s
1. Squeeze the gel cleanser in the middle of your palm
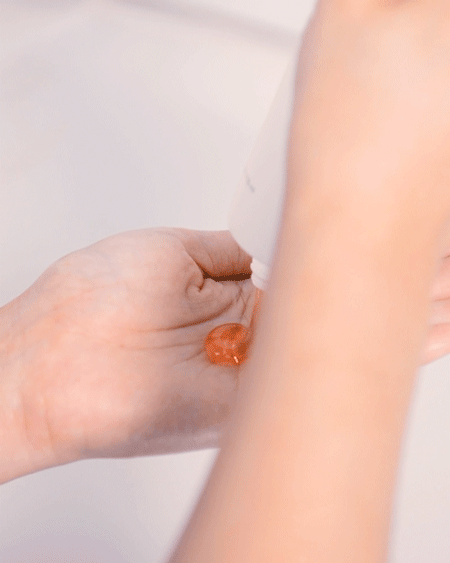
Squeeze Cleanser 1 in the centre of your palm instead of your fingertips or all over your hand. This gives you more surface area to emulsify the product, which makes it easier to create foam.
Tip: Spread and emulsify till small bubbles appear

Spread the cleanser across your palms a little after adding small amounts of water. Emulsify till it turns white.
2. Add small amounts of water in intervals and “whisk”

Lather by adding small amounts of water. Sweep across your palm with light circular strokes. This helps to introduce more air, which enables the cleanser to foam up quickly. Whisk for a few seconds before adding small amounts of water and repeat.
3. Constantly scoop up the foam and any remaining pink gel on your hand and place them in the middle of your palm during the foaming process

The whisking motion will inevitably cause the foam and any remaining pink gel to settle around your hands. Constantly scoop them to the middle of your palm and ensure none of the gel is sticking to your hands so that all the product is being used.
Keep sweeping in a circular motion repeatedly. This will help to increase the amount and density of the foam produced.
Don’ts
4. Don’t forget to wash your hands with soap

Clean hands will help you lather up Cleanser 1 easily. It is always important to wash your hands with soap before cleansing to prevent any grime or dirt from coming into contact with your face.
5. Don’t add too much water to the foam

Adding too much water to the foam may wash the foam away, ruining all your effort!
6. Don’t rub both palms together

Do not rub both palms against each other or exert too much force. The cleanser will not be able to foam up this way.
Do’s and don’ts infographic
Here’s a quick infographic you can save and refer to while foaming Cleanser 1!

There is no “one right way”
While the tips above will help, there really is no “one right way” to do it! Every user has his/her own unique way of foaming up Cleanser 1. Some may even prefer using a foam maker (make sure your foam maker is well-cleansed if you choose to do so this way!). The goal is to obtain the rich dense foam responsible for effective cleansing.

If you’re in doubt or want more tips and tricks to help you grasp the right technique, feel free to approach your Skin Buddy for help.
Have a tip on how to foam Cleanser 1? Comment down below!